
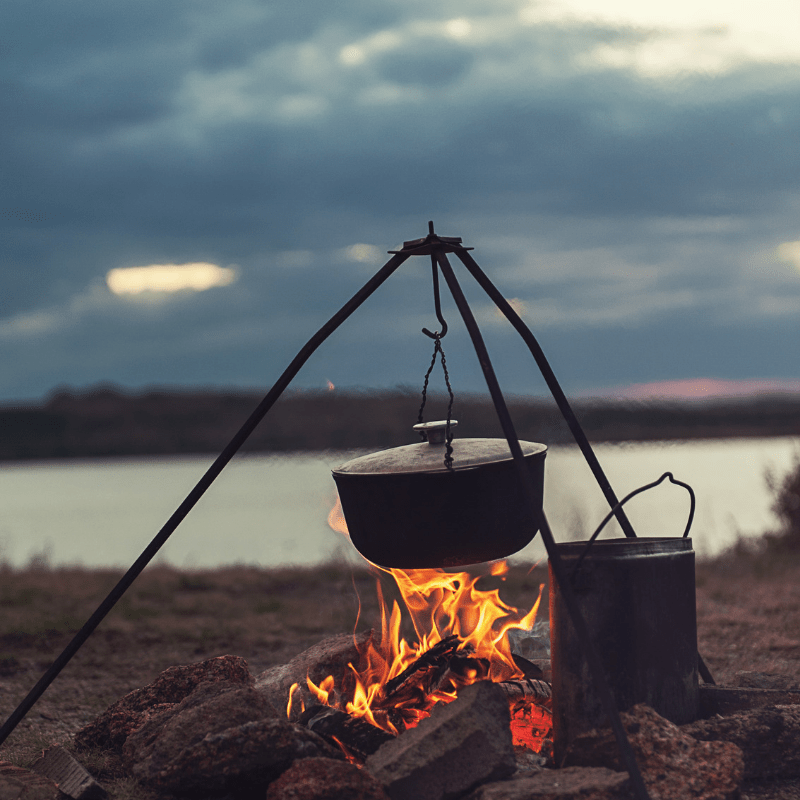
Why does food always taste better when it’s cooked over an open fire? There is something primal to me about cooking over fire that makes me feel like I am a great explorer in the wilderness, even if I only am 45 minutes from the city at a public campsite! LOL. Now, if you work all week long and want to slip away for the long-weekend you don’t always have a ton of time to prep and cook things before hand. This is where I want to provide you some simple healthy recipes for all your camping meals, plus easy portable snacks. I have 5 breakfasts, 5 Mains, 5 Sides, 5 Snacks, and 5 Drink recipes for you below. I have given you a range of recipes that take less than 5-minutes to throw together, foods you can make or buy based on your time, and then recipes that take a little more prep but are well worth it. You can mix and match based on how much time you want to dedicate to camping food so its flexible.
Additionally, to make things even easier I curated a 4-day long weekend simple getaway meal plan & grocery list you can print out anytime. To keep this meal plan interesting, feel free to swap out the recipes I have provided in the plan with new one’s below. I also have a List of Healthy Snacks you can buy to pack into your bag or car. I hope these recipes and the free simple getaway long-weekend meal plan reduces your time planning and prepping so you can have more time doing the stuff that really matters, being with and doing the things you love the most.
25 Healthy Camping Recipes:
BREAKFASTS:
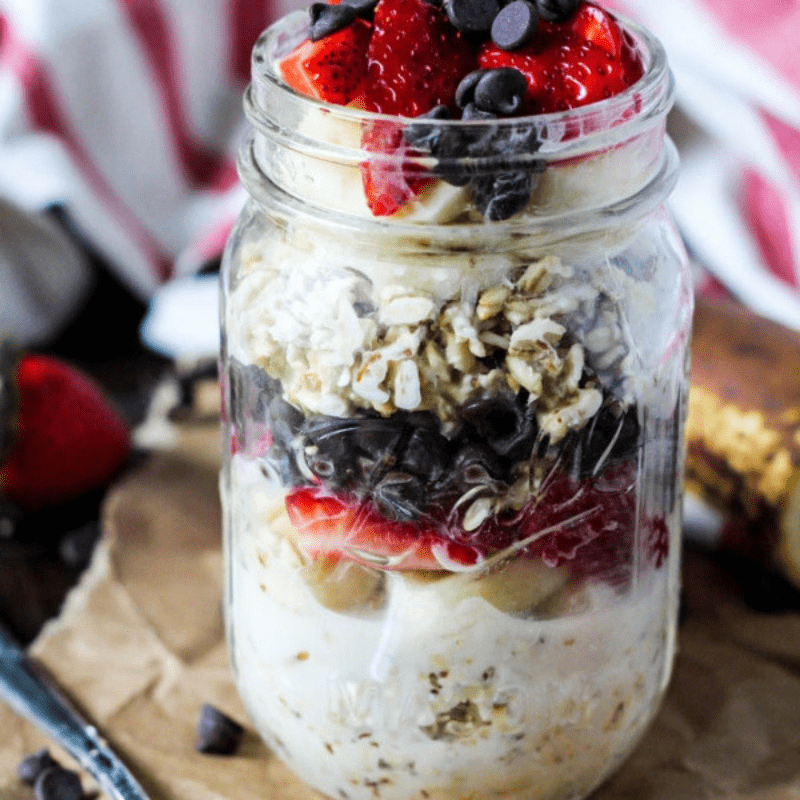
1) Banana Split Overnight Oats (4 servings)
- Ingredients:
- 2 cups old fashioned oats
- 3 teaspoons chia seeds or ground flax
- 4 cups coconut or almond milk
- 1 tablespoon maple syrup or stevia
- 1 tsp vanilla
- pinch of sea salt
- 2 bananas, sliced
- 1 cup sliced strawberries
- ¼ cup 70% dark chocolate chips or cacao nibs
- 1/4 cup of walnuts or pecans (optional)
Instructions:- Place oats, chia, milk, sweetener, vanilla, sea salt into a bowl and mix until well combined and let sit for a 2-5 minutes.
- Next you can fill up 4 containers equally with the mixture and place banana, berries, and chocolate chips and nuts on top, seal the container and pop them in the fridge. OR, you can layer them if you have more time. I like layering strawberry, chocolate and nuts with oats then top off with bananas and a few more chocolate chips.
- These will keep well in a cooler for 4-5 days. Enjoy cold or warm based on your camping needs.
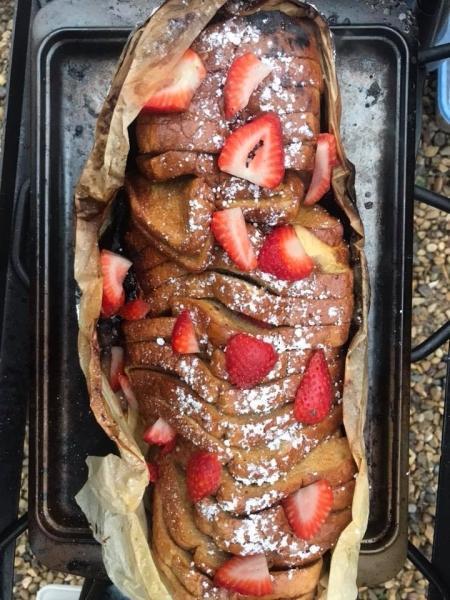
2) Campfire French Toast (2-4 servings)
Ingredients:
- 4 large free-range eggs
- 1/2 cup of your favourite milk of nut milk beverage
- 1 tbsp maple syrup
- 1 tbsp pure vanilla extract
- 1 tbsp cinnamon
- 1 loaf of your favourite thickly sliced bread
- 1 cup sliced strawberries, for serving
- 1/4 cup organic powdered sugar, garnish optional
- Maple syrup, for serving
- Foil for wrapping
- coconut oil or avocado oil spray (or butter to grease the foil)
Instructions:
- Grease a large piece of foil with oil or butter and shape it into a boat. Place the whole loaf of bread inside, standing up to keep its loaf shape. (It’s okay for slices to fall slightly open.) Add another piece of foil underneath for double support.
- Meal Prep: Now I personally like to put eggs, milk, sugar, vanilla, salt and cinnamon into a mason jar and pack it into the cooler. This way when it time to make this dish I simple shake it up and pour it over top of the loaf. However, you can whisk these few ingredients in a bowl onsite as well. Carefully pour over bread, making sure to get between each slice.
- Cover whole loaf with another piece of foil and tuck in all around so the bread is completely enclosed.. Place over campfire — NOT over the hottest part — until egg mixture is cooked through and bread is lightly toasted, about 30 minutes.
- Remove carefully from the fire with tongs. Remove the top layer of foil on the table and sprinkle with powdered sugar and garnish with sliced strawberries. Serve warm with syrup.
3) Shake & Pour Mason Jar Scrambled Eggs
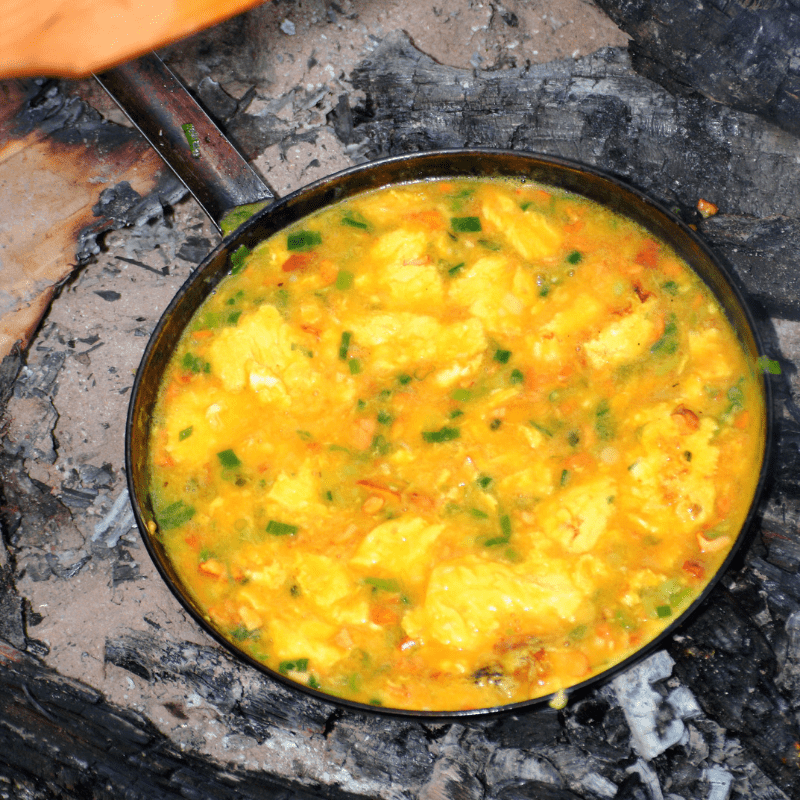
Meal Prep: So I like to crack a whole dozen eggs into a large mason jar and chop up whatever veggies I have in my fridge and place them in the jar with the eggs. I add 1 cup of milk or cream, cheese of choice, a dash of hot sauce and some salt and pepper. I secure the lid and put the whole jar into the cooler to take camping. Now in the morning, I just shake the jar, and pour it into a greased skillet over the fire for easy scrambled eggs! Some of my favourite combinations are:
- Mexican Scrambled eggs: sliced peppers, onions, jalepnos, sharp cheese, black beans, red pepper flakes
- Empty the fridge veggie Omlette: literally whatever veggies are in the crisper from zucchini, broccoli, green onions, etc. with salt and pepper and cheese of choice
- Kale & Goat Cheese: chopped up kale, red onions, goat cheese, salt and pepper
- Bacon, Cheese, and Chives: prepcook or good quality bacon bites into the mix with cheddar cheese, fresh chives and seasoning is a great classic
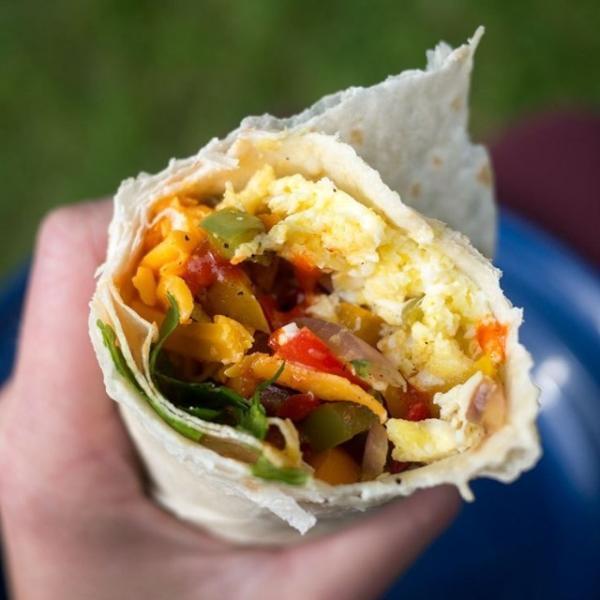
4) Meal Prepped Veggie Breakfast Burritos (6 servings)
Ingredients:
- 1/8 cup avocado or olive oil (divided)
- 2 Garlic (cloves, minced)
- 1/2 cup Red Onion (large, diced)
- 1 Sweet Potato (large, peeled and diced into 1/2 inch cubes)
- 1 Red Bell Pepper (diced)
- 1 Green Bell Pepper (diced)
- 1 tsp Cumin
- 1 tsp Chili Powder
- 1 tsp Sea Salt
- 8 Eggs (large, whisked)
- 4 oz of cheese (shredded jack, feta, or goat cheese is great)
- 6 Large Tortillas (use brown rice or corn for a gluten-free option
Instructions:
- Set oven to 4o0 degrees and line a baking sheet with parchment paper
- In a bowl toss all cut veggies with 3/4 of the oil and seasoning and spread evenly out on the parchment and bake for 30 minutes (until veggies are cooked and soft).
- Meanwhile in a skillet over medium heat, cook the eggs and cheese in the remaining oil until cooked through
- Divide egg and veggie mixture equally between the burritos.
- Roll up tightly in foil and place in fridge or freezer.
- To reheat, place the foil packets right into the fire pit where the heat is low-medium for 5-10 minutes or into a hot cast-iron skillet over the fire turning one halfway through the cooking. Open up and enjoy!
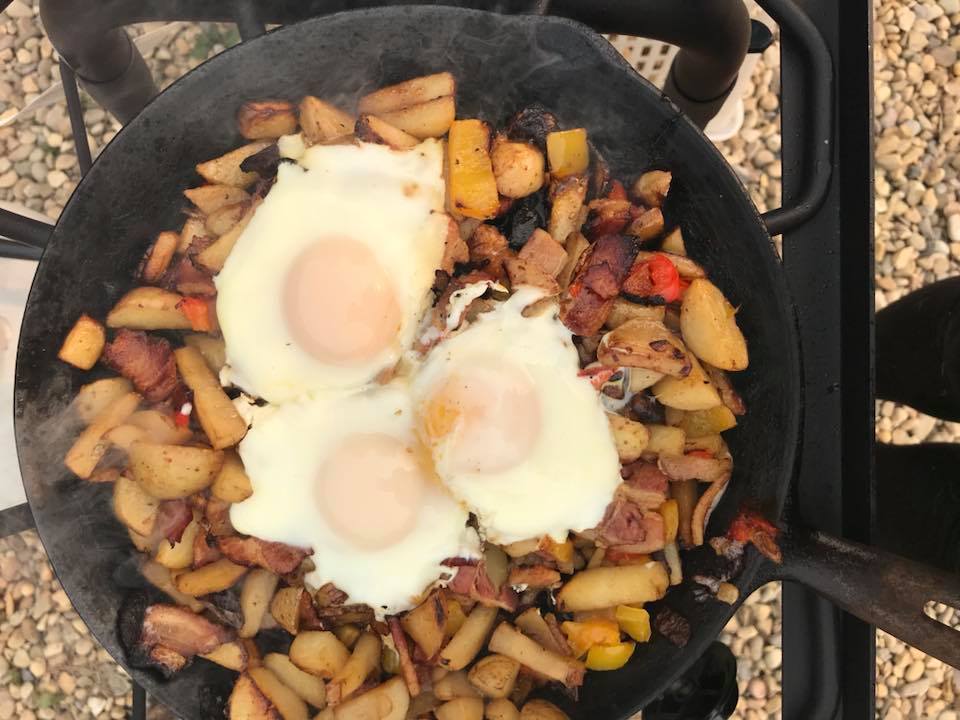
5) Cast-Iron Breakfast Hash (2-4 servings)
Ingredients:
- 5 cooked sausages or bacon slices cut into bit size pieces
- 1 yellow onion, diced
- 1 small apple cubed
- 4 cups of potatoes chopped
- 3 cloves of Garlic, minced
- 3 tbsp avocado or olive oil
- 1 tsp red pepper flakes
- salt and pepper to taste
- 2-4 eggs (one per serving)
- 1 tbsp oil or butter
Instructions:
- I like to prep this at home, so this makes for a super easy breakfast in the morning. I pre-cut all the veggies and place everything minus the eggs into large ziploc bag and give it a good shake. The ziplock bag lays perfectly flat in a cooler!
- In the morning all you have to do is heat your skillet over the fire with oil or butter, then empty the bag into the pan and cook for about 10 minutes (hint: the smaller you cut the potatoes the faster the cooking time).
- Once the veggies are soft, crack your eggs over top cover with a lid and cook 2-5 minutes based on how you like your eggs.
Mains
1) Easy TinFoil Protein Packs
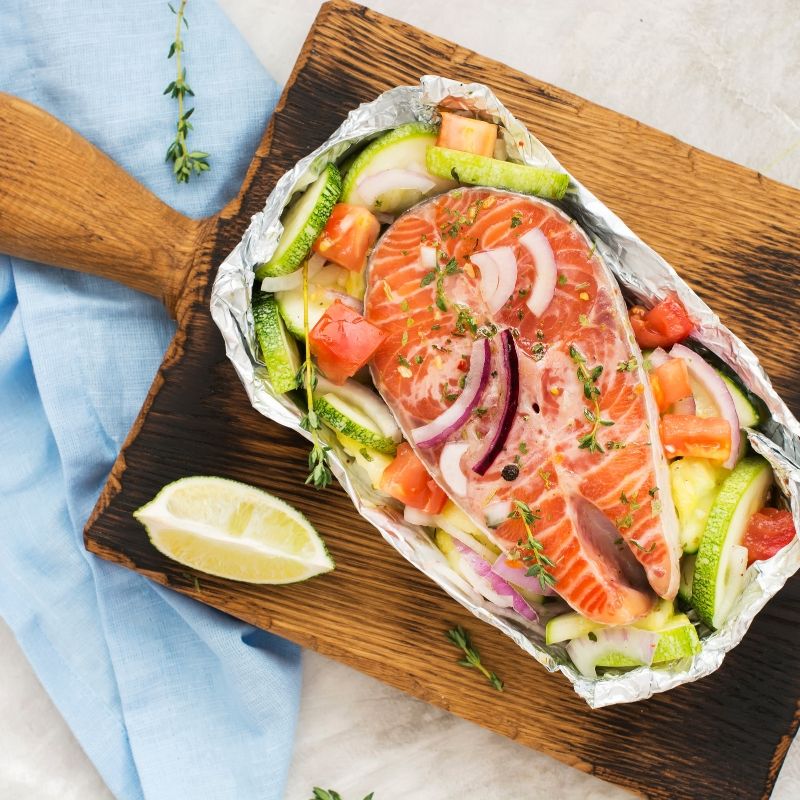
These are probably one of my favourite dishes to have while camping. Your combinations are endless! Simply you make a bit of a boat with your tinfoil. Then place 1 cup of your favourite mixed veggies into the boat, top with 3-6 oz piece of protein, season with your favourite spices, herbs, oil or butter and cover the top with another piece of foil. I typically put one more piece around the whole thing for stability and to ensure nothing leaks. These can be make before you go and placed into a cooler or onsite. If I make them onsite, I typically pre-cut the veggies in the dressing I was in large ziplock bags and lay the different combinations in a cooler. Here are some of my favourite tinfoil combinations:
Clean Salmon Packs: Salmon fillets on zucchini, tomato, red onion with lemon, olive oil and fresh herbs
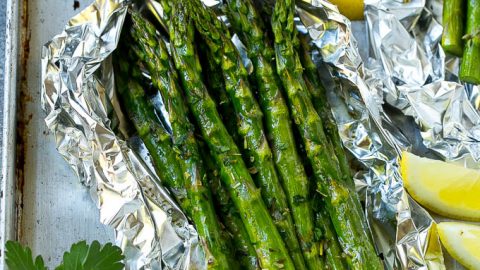
Cheesy Shrimp Pack: Shrimp, asparagus, parmesan cheese lemon, butter, fresh herbs
BBQ Hawaian Packs: Chicken breast, red peppers, orange peppers, onions, pineapple rings, bbq sauce, salt and pepper.
Surf’n’turf Packs: Steak, shrimp, corn on cob cut into 4″ pieces, red onions, cherry tomatoes, butter, chives and lime juice.
Garlic Gnocchi Packs: Gnocchi, butter, mushrooms, chives, garlic, red pepper flakes, 2 tbsp water per pack.
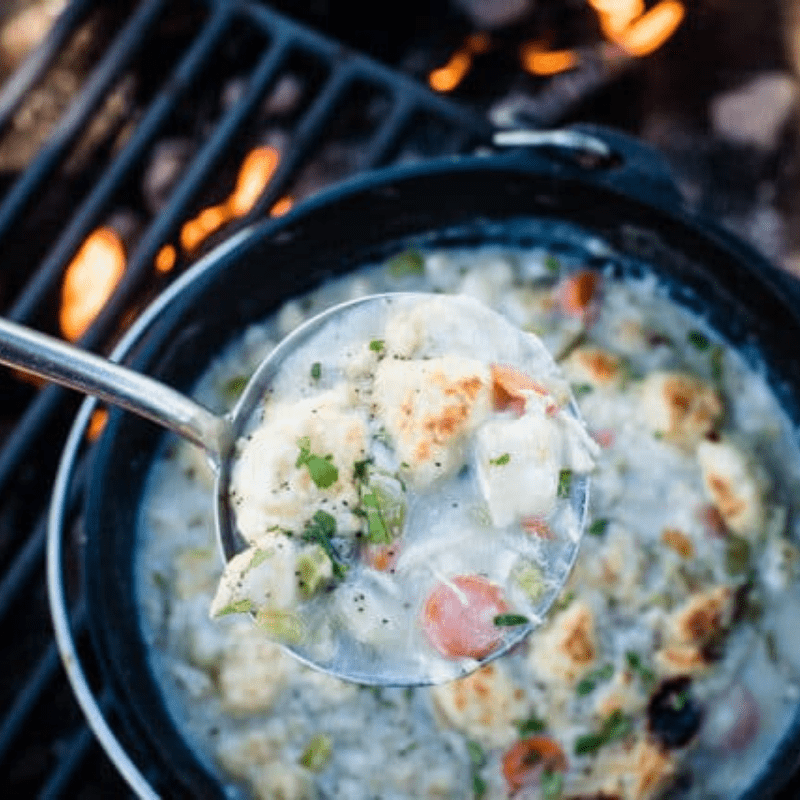
2) Dutch Pot Chicken & Dumplings (6 servings)
Ingredients:
- 2 pounds, shredded or chunked chicken
- 2 cups water
- 1 yellow onion, diced
- 4 celery stalks, chopped
- 4 medium carrots, chopped
- 3 cups biscuit mix
- 1 cup cream, or 2% whole milk (use coconut milk for dairy free)
- 1 tablespoon minced fresh parsley
- salt & pepper to taste
Instructions:
- Place chicken and water in a Dutch oven. Cover and bring to a low boil for about 20 minutes. Remove chicken carefully and cube.
- Return chicken to the dutch oven with the chopped veggies Bring to a boil.
- Reduce heat, cover and simmer for 30 45-minutes or until the vegetables are tender.
- For dumplings, combine the biscuit mix, milk, parsley, salt and pepper to form a stiff batter (you could buy the biscuits from the freezer or fridge section of your grocery store instead)
- Drop by tablespoonfuls into the simmering chicken mixture.
- Cover and simmer for 15 minutes until biscuits are cooked.
- Let sit for 5 minutes to cool and then serve immediately.
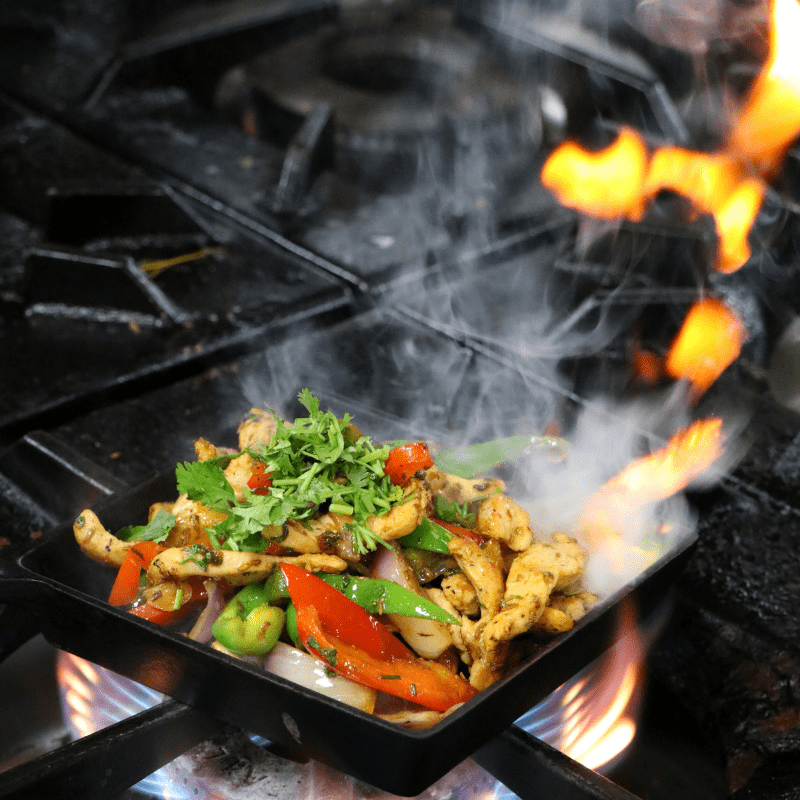
3) Easy Campsite Fajitas (4-6 servings)
Ingredients:
- 2-3lbs of chicken breasts, sliced
- juice and zest of 2 lime
- 1/8 cup of avocado oil
- 1 clove garlic minced
- 1/2 cup of cilantro chopped (divided)
- dash of hot sauce
- salt and pepper to taste
- 1 red & green bell pepper chopped
- 1 onion chopped
- 1 pack of flour or corn torillas
- Pack salsa, sour cream and cheese if desired
- extra lime wedges (optional)
Instructions:
- I like to prep these before I leave. I place chicken and all the marinade ingredients into a large ziplock bag ( zest and juice of lime, oil, garlic, 1/2 the cilantro, hot sauce, salt and pepper). This lays flat in the cooler and will marinade till its time to cook.
- Heat your pan over medium heat, empty the contents of the bag and cook until the chicken is cooked through (8-10 minutes).
- Add veggies onto and cook until soft (about 5 more minutes).
- Serve the pan on the table with tortillas with your topping of choice.
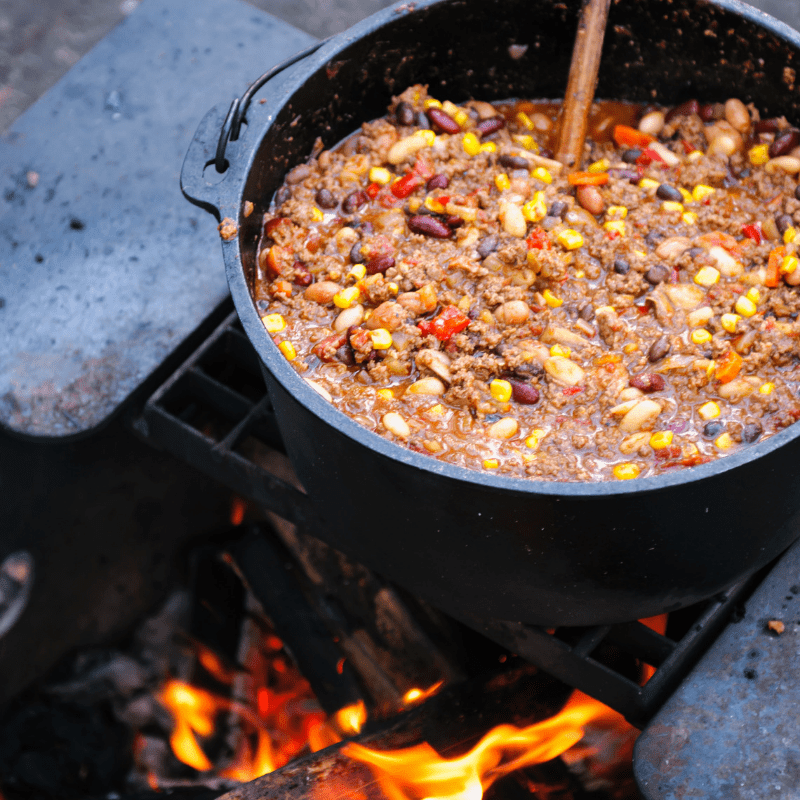
4) 5 Can Chili (6 servings)
Ingredients:
- large yellow ,
- 2 gloves of garlic, minced
- 1 red pepper chopped
- avocado
- ,
- ,
- , (I’m sure you have one kicking around the campsite)
- salt & pepper to taste
Instructions:
- In a large dutch oven, heat the oil over medium heat until shimmering. Add the onions, peppers, garlic and saute until they begin to soften. Add the remaining ingredients. Stir to combine.
Cook the chili until thickened to your liking, about 20 minutes was perfect for us. Serve immediately with your choice of toppings (cheese, avocado, green onions, etc) and cornbread on the side!
10) Leftover Chilli- Chilli Dogs or Sloppy Joe’s
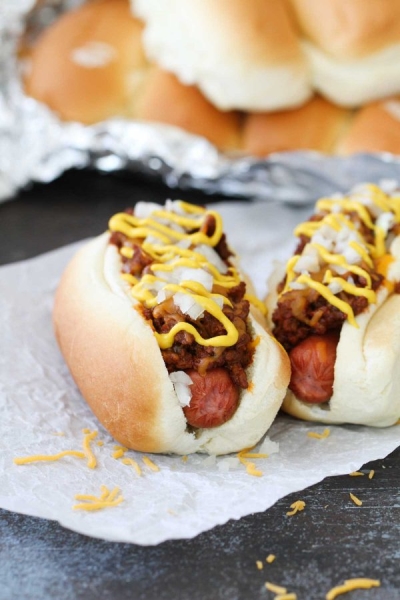
OK. So, when I consult with clients in the summer one of the first things that comes up is, “but what about my summer hot dogs?!?” I get it, its summer and a hot dog around a campfire is kinda a thing. I debated putting this recipe in but I wanted everyone to remember that healthy sustainable eating is all about balance and still enjoying those food rituals with our families that we love. Now, you might have some leftover 5-can chilli from dinner the night before. This is perfect for your lunch the next day.
- I like to pick-up a pack of good quality chicken or all beef hot dogs from the butcher when I do have hot dogs. Chop up some onion, set up some cheese, your condiments, buns and your leftover chilli and you have chilli dogs for lunch.
- Another option for leftover chilli, is to place it in a soft whole grain bun and wrap it in foil and place it in the low heat part of the fire for a Leftover Sloppy Joe.
Side Dishes:
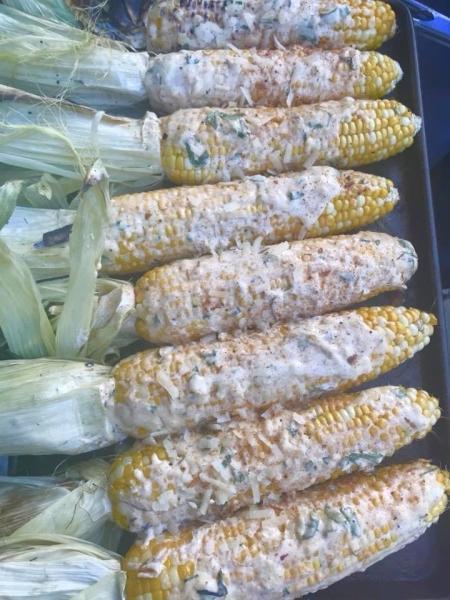
1) Mexican Street Corn (serves 6)
Ingredients:
- 6 ears corn, shucked and cleaned
- 1/2 cup of avocado mayonnaise
- 1/2 cup of plain greek yogurt or sour cream
- 1 tsp Chili powder
- 1/2 cup Grated cotija cheese or asiago cheese
- Juice of 2 limes
- 1/2 cup cilantro, chopped
- Serve with additional lime wedges, optional
Instructions:
- You can cook your corn one of 2 ways. If you are cooking corn on a grill, grill on medium-high heat for 10 minutes. Rotating the corn to char evenly. If you do not have a grill, you can wrap the corn in foil with a tbsp of water and steam them in the low heat part of the fire pit. Ensure the corns are wrapped tightly in the foil so steam does not escape.
- Meanwhile mix all the remaining ingredients in a bowl.
- With a BBQ brush, brush the mixture onto of the corn so it is covered on one side. Place the corn back on the grill or rewrap in the foil and cook for an additional 5 minutes so the cheese melts. Serve with additional lime wedges and cilantro.
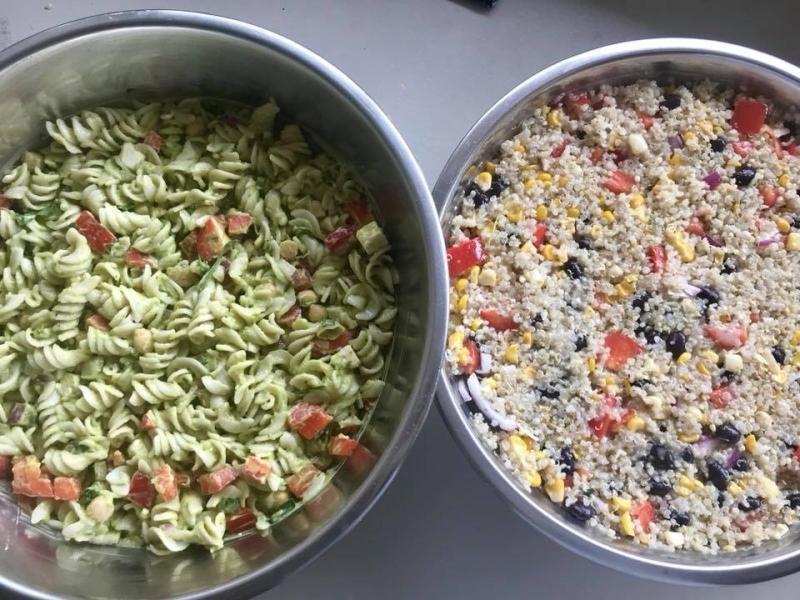
2) Southwest Quinoa Salad (serves 8-10)

I decided to not remake these salads and do a home photoshoot for these next two recipes as I would normally do. Instead, I took photos right off my phone that I snapped while making them at the lake house last summer. These two salads I have made on our summer vacation for the past 5 years and they are a fan favourite. I make them either before I leave if I am camping or onsite if we have rented a house. Then I have a cold side salad that is great for lunch and dinners for the whole week. Kids and adults love these salads! So I am so happy to share my family recipes with yours.
Ingredients:
- 1.5 cups of quinoa
- 3 cups of water
- 1/2 red onion, diced
- 1 red peppers, chopped
- 1/2 cup of cilantro chopped
- 1/2 cup asiago cheese
- 1, 14oz can of black beans, rinsed and drained.
- 1, 14 oz can of corn (of left over Mexician street corn from dinner the day before- YUM!)
- 1/2 cup of avocado or olive oil
- 2 tbsp red wine vinegar
- juice of 2 limes
- 1 garlic clove, crushed
- 1 tbsp red pepper flakes
- salt and pepper
Instructions:
- Rinse the quinoa thoroughly under cold water, and drain. Boil water and cook quinoa per package instructions. Set aside and allow quinoa to cool in a large bowl while you chop the veggies.
- Mix in chopped veggies, cheese, and beans.
- In a small bowl or jar whisk the dressing ingredients and pour overtop of everything. Mix well and refrigerate in an air-tight container for 5 days.
3) Avocado Protein Pasta Salad (8 servings)
Ingredients:
- 1 package of your favourite pasta (I like quinoa pasta)
- 1 red pepper, chopped
- 1, 14oz can of chickpeas, rinsed and drained
- 1/2 red onion, diced
- 1/2 cup of crumbled feta
- 1/2 cup chopped cilantro or parsley
- (cooked leftover bacon from breakfast is also awesome in this salad- optional).
- 1 ripe avocado
- 1 lime juiced
- 1 clove of garlic
- 1/2 tsp cumin
- 1/2 cup avocado or olive oil
- salt and peper to taste
Instructions:
- Cook pasta according to directions, drain rinse, cool and set aside in a large bowl.
- Add the chopped veggies, cheese, and proteins.
- In a blender blend all the remaining dressing ingredients together until thick and creamy. If you have no blender, smash the avocado with a fork in a bowl and transfer to a jar with the remanning ingredients, seal with a lid. Shake well to combine all ingredients.
- Pour dressing over the salad. Mix well and store in an air-tight container for 5 days in the fridge or cooler.
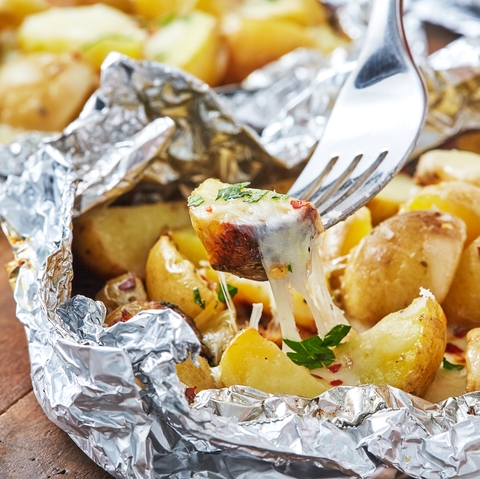
4) Tin Foil Potato Packs (4 Servings)
Ingredients:
- 2 cups of cut yellow potatoes
- 1/2 cup parsley, chopped
- 1/4 cup asiago cheese, shredded
- 1 tsp red pepper flakes
- 1 tsp Worcestershire sauce
- salt and pepper to taste
- 3 tbsp water, broth (or hey beer works too)
Instructions:
- Combine the cheese, parsley, sauce, salt and pepper; sprinkle over potatoes.
- Fold foil up around potatoes and add broth or water. Seal the edges of foil well. Grill, covered, over medium heat for 25-35 minutes or until potatoes are tender.
5) Easy Campfire Steamed Veggies (4 servings)
Ingredients:
- 3 cups of your favourite veggies
- 1/4 cup water or broth
- 1 tsp butter or ghee
- salt and pepper to taste.
Instructions:
- Make a foil boat. Place your veggies to steam inside, I like broccoli, asparagus, green beans, peppers, zucchini, etc.
- Add butter, seasoning and water. Cover with foil and crimp the sides so no steam will escape.
- Place the foil pack in the low-medium heat part of the fire and let steam for 5 minutes. Open and enjoy fresh steamed veggies while in the woods.
Snacks:
1) Chips & Salsa
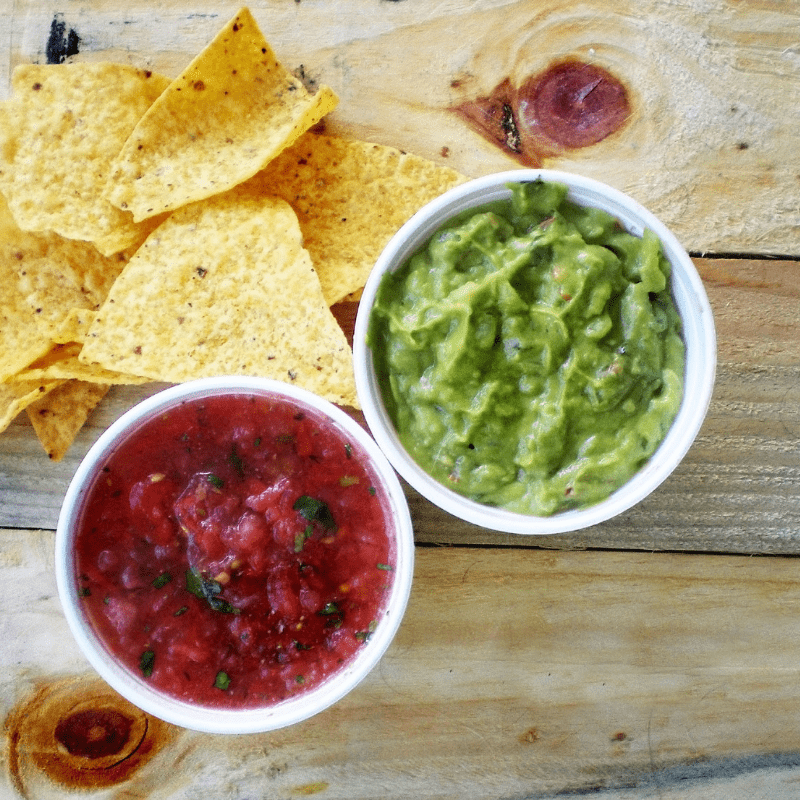
There is nothing more satisfying and simple that chips and dip. A healthier version is a good quality tortilla chip, some of my favourites are and . You can buy a container of guacamole and your favourite salsa to pack in your bag. If you have bit more time you can make a simple salsa, recipe here or a summer favorite Spicy Peach Salsa. Snag both my recipes above. Also, you can make my great Greens Powered Guacamole! This recipe will fuel you for the hike up the mountain.
2) Anytime Protein Muffins (12 servings)

I like to make these muffins before we leave so we have smacks in the car and for quick protein muffins for the week ahead.
Ingredients:
- 1 2/3 cup oat bran
- 1 scoop protein powder (about 1/4 cup)
- 2 teaspoons baking powder
- 1 teaspoon cinnamon
- 2 small or medium very ripe bananas, mashed
- 1/2 cup unsweetened applesauce
- 1/2 cup nonfat plain greek yogurt
- 1 large egg
- 1 teaspoon vanilla extract
Instructions:
- Preheat oven to 400 degrees F. Spray 12 cup muffin tin with nonstick cooking spray or use muffin tins.
- In a medium bowl whisk together oat bran, protein powder, baking powder and cinnamon; set aside.
- In a large bowl, mix mashed banana, applesauce, greek yogurt, egg, and vanilla together until well combined and smooth. Add wet ingredients to dry ingredients and mix until just combined.
- Divide batter evenly into 12 muffin cups and bake 15 minutes or until toothpick inserted into center comes out clean. Transfer to a wire rack to cool for 10 minutes, then remove muffins from tin and place on wire rack to cool completely.
- Muffins are best served warm with your favorite spread. Feel free to add in cacao nibs, chocolate chips, berries, or nuts to the batter to make it your own.
3) Make ahead Yogurt Parfaits (3 servings)
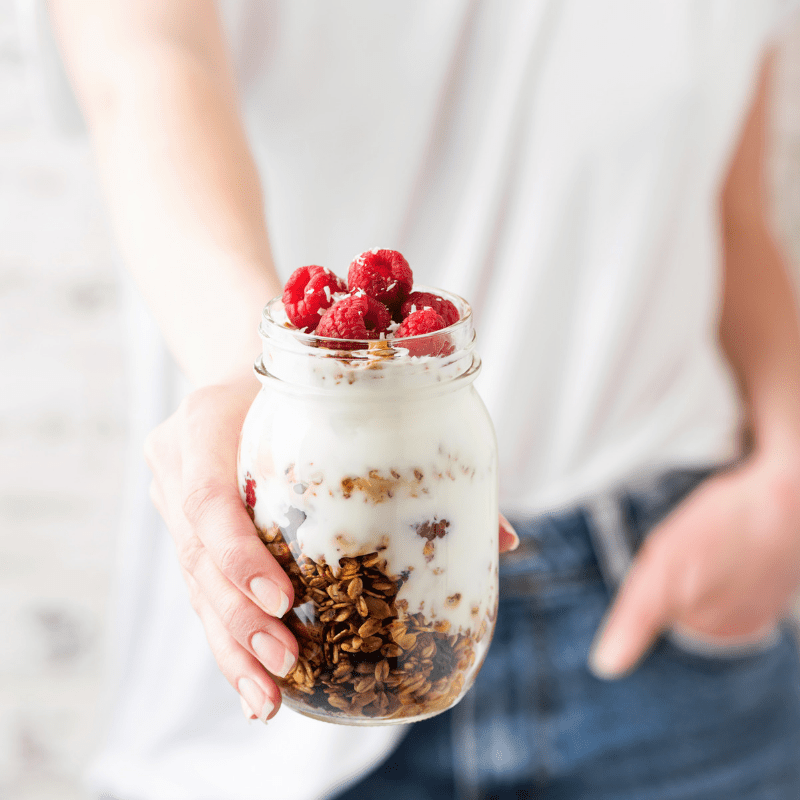
These are some of my favourite meal prep jars for any vacation. The combinations are endless and you can tailor them for breakfast, snacks or even more towards a dessert. The stack great in your cooler and are delicious!
Base Ingredients:
- 2.5 cups plain greek yogurt
- 3 tbsp maple syrup, honey or a few drops of stevia
- 1 cup granola.
Parfait Add-ins:
- Mixed Berry: 1/3 cup blueberries, 1/3 cup raspberries
- Blueberry Lemon: 1/2 cup blueberries, 2 tablespoons lemon juice (mixed into yogurt), 2 tablespoons slivered almonds
- Apple Cinnamon: 1/2 honeycrisp apple, 1 tablespoon lemon juice (mixed into yogurt), 2 tablespoon slivered almonds, 1/4 teaspoon cinnamon
- PB Banana: 1 small banana sliced, 1 tablespoon peanut butter, 1/4 cup chocolate chips
Peanut Butter & “Jelly”: 2/3 cup smushed raspberries, 1 tablespoon peanut butter.
Ingredients:
- In a small bowl, mix Greek yogurt and sweetener.
- Layer yogurt and selected parfait add-ins in a small mason jar or sealable container. I like to do two layers each of yogurt and add-ins. Top with granola.
- Store in the refrigerator or keep in your cooler upright and eat within 3 days.
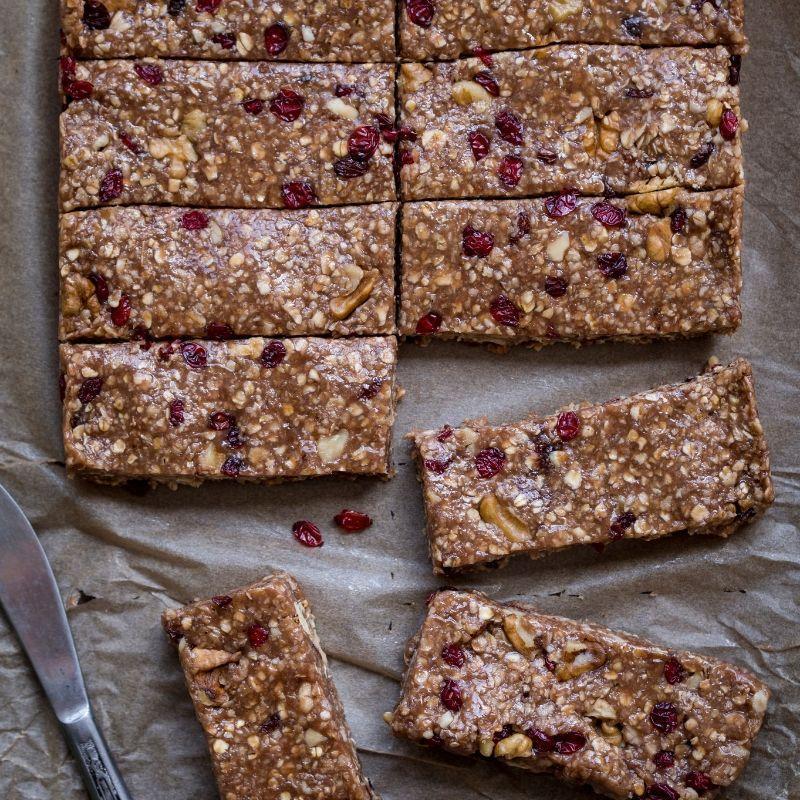
4) Energy Packed Chewy Granola Bars
Ingredients:
- 1/2 cup nut butter of choice (almond, cashew, peanut, etc)
- 1/4 cup honey, maple syrup or use stevia for a sugar-free option
- 1/2 cup water
- 1 teaspoon vanilla extract
- 1 cup oats (use gluten-free as needed)
- 1/2 cup almond flour
- 1/4 cup ground flaxseed
- 1/2 teaspoon baking powder
- 1/4 teaspoon salt
- 1 cup of your favourite trail mix or any combination of nuts, seeds, chocolate, and dried fruit
Instructions:
- Preheat oven to 350 degrees. Line an 8×8″ pan with parchment paper. Set aside.
- Mix all wet ingredients in a large bowl until combined. Mix all the dry ingredients in another small bowl.
- Add the dry ingredients into the large bowl with the wet ingredients a little at a time. Stir with a wooden spoon or rubber spatula to combine. Batter will be thick.
- Scrape batter into prepared pan, and bake for 18-22 minutes, or until bars are slightly golden around the edges. Remove from oven and cool to room temperature.
- Slice cooled bars into 10 rectangles or 20 smaller squares. Store in a sealed container for up to 10 days at room temperature.
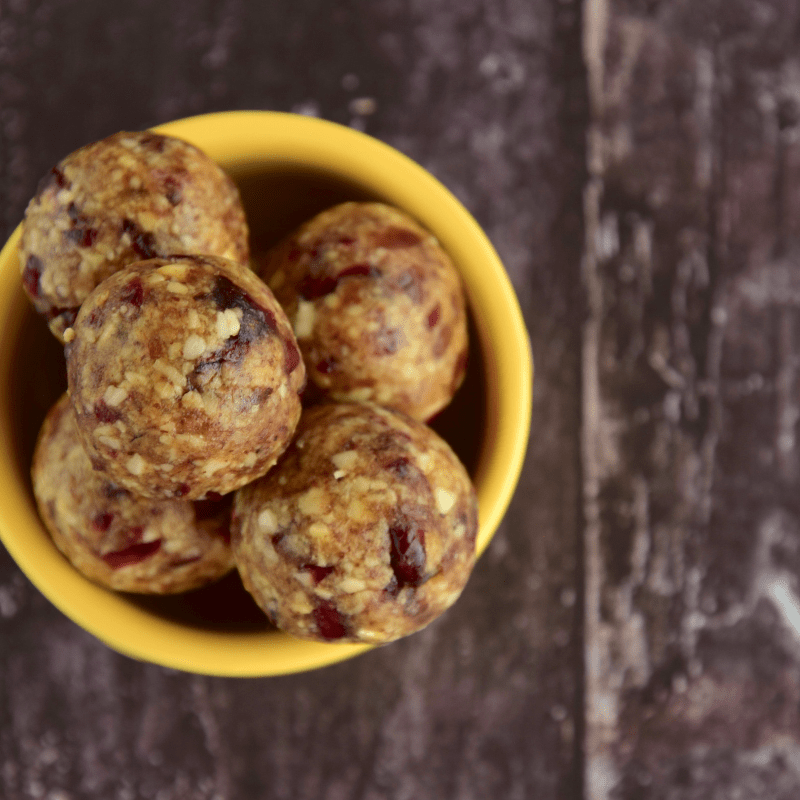
5) No-Bake Trailmix Energy Bites
Ingredients:
- cup rolled oats, use gluten-free if needed
- maple syrup, honey,
- nut butter of choice (p
- 1/4 Cup dried fruit (raisins or cranberries)- omit for keto
- 1 tsp Cinnamon
Instructions:
Mix all ingredients together in a bowl until thoroughly combined.
Set in the refrigerator for 15 min- 1 hour to allow the mixture to get firm making it easy to roll.
Using a mini ice cream scoop or a spoon collect a small amount of mixture and roll in your hands to form into bite-size balls. If you find its sticky put it back into the fridge to firm or a little coconut oil on your hands when rolling energy balls make perfectly rolled energy bites every time.
These bites are great to take with you and will keep in an air-tight container in your tent, your back pack or in the jeep.
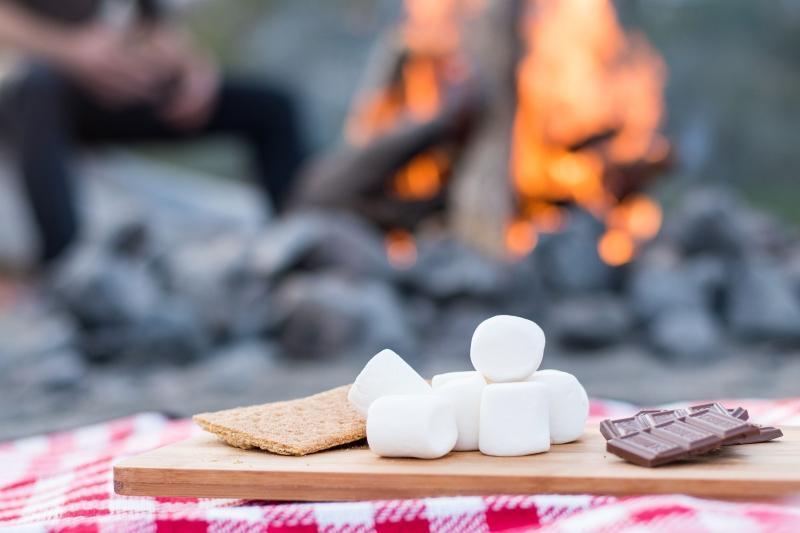
Desserts:
1) Campfire Banana Boats (4 servings)

Ingredients:
- 4 large bananas
- 1 cup mini marshmallows
- 1/2 dark chocolate chips
- 1/4 crushed graham crackers or nuts
Banana Boat Variations:
- CLASSIC S’MORES: Banana + Dark Chocolate + Mini Marshmallows + Crumbled Graham Crackers
- DULCE DE LECHE: Banana + Chocolate + Dulce de Leche sauce + Unsweetened shredded coconut flakes
- PB & J: Banana + Peanut Butter + Raspberries + Chocolate Chips
- BANANA SPLIT: Banana + Dark Chocolate + Marshmallows + Strawberries
Instructions:
- Take a banana with its peel still on and cut it down the middle (along the concave side). Not all the way through, but until the tip of your knife just grazes the peel on the other side. You can then pull the peel and banana slightly ajar.
- You then want to fill your banana with some ingredients. The basic recipe is something that melts (marshmallows), something sweet (chocolate chips) and something crunchy (graham crackers). There are a number of other combinations following those 3 basic ideas.
Toppings are stuffed in a single line down the centre of the banana. Feel free to mash your banana to either side to make some extra room.
- Wrap the banana in tin foil so it is completely enclosed. The idea is to warm the banana to get everything melted and gooey. So place the boats in the low heat part of the fire for a few minutes.
- Unwrap, grab a spoon an dig in.
2) Fresh Fruit Rainbow Salad (6-8 servings)
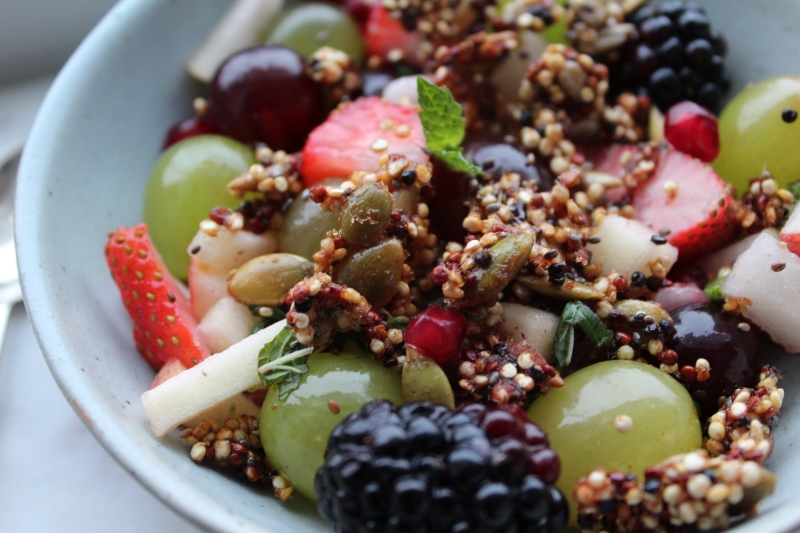
This fruit salad with honey lime dressing and quinoa crunch, is one of my staples for summer picnics, potlucks, camping or a weekend at the lake. It is sweet and crunchy! I use it as a side dish for breakfast, a healthy snack during the day and can turn it into dessert easily with coconut whipped creamy and melted chocolate drizzle at night. Grab the full recipe and step by step pictures in the blog post here
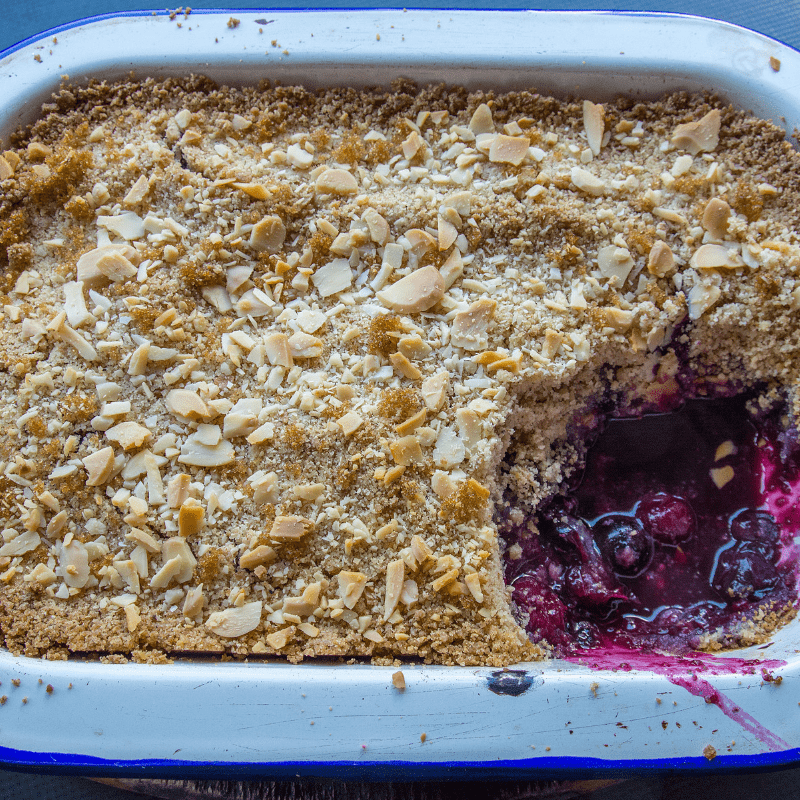
3) Campfire Crumbles (8 servings)
Instructions:
- 3 cups of fruit sliced of choice (blueberry, strawberry, peach, apple, etc, pick your flavour of cobbler or mix and match. Blueberry and peach is an awesome combination)
- 1/4 cup organic cane sugar , maple syrup (or stevia for sugar-free)
- 2 tbsp cornstarch
- 2 tsp. ground cinnamon
- pinch of kosher salt
- 2 cups Almond flour
- 1 tbsp baking powder
- 1/2 cup milk or nut milk of choice
Instructions:
- In a large resealable plastic bag, combine fruit, 1/4 cup sugar, cornstarch, cinnamon, and salt. Seal tightly and shake bag until fruit is evenly coated. I like to do this before I leave, the ziploc packs flat in a cooler.
- In another large resealable plastic bag or jar combine almond flour, baking powder and milk. Seal and mix, kneading with your hands, until completely combined. Pack this in the cooler as well.
- Butter or oil a large cast-iron skillet. Add fruit mixture and top with flour topping. Sprinkle with remaining 2 tablespoons sugar.
- Cover with foil and cook over a campfire until topping is no longer doughy and fruit is warm and bubbly, 50 minutes.
- Let cool 20 minutes, then serve.
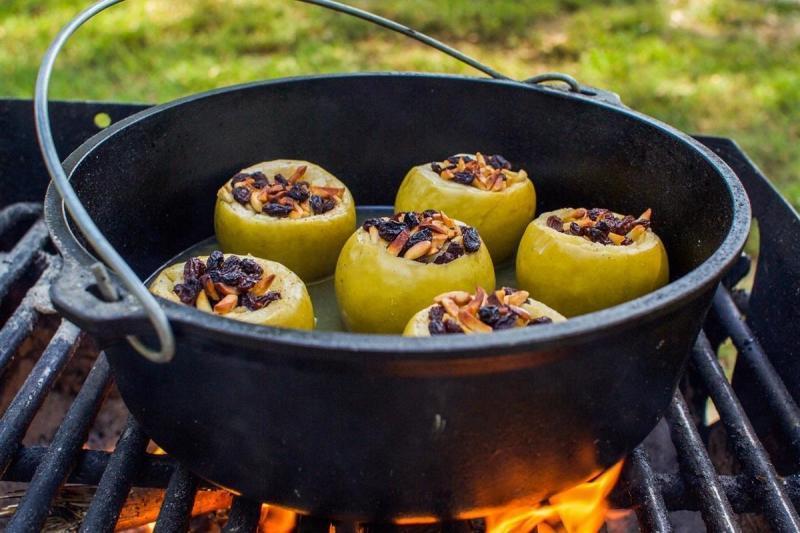
4) Baked Apples
Instructions:
- 6 granny smith apples
- 1/4 cup raisins
- 1/4 cup rolled oats (gluten-free as needed)
- 1/4 cup slivered almonds
- 1/8 cup dark chocolate chips (optional, use sugar-free as needed)
- 2 tsp. ground cinnamon
- pinch of kosher salt
- 2 tbsp cane sugar, maple syrup (or stevia for sugar-free)
- 1/4 grass-fed butter, ghee or coconut oil
Instructions:
- Core the apple but not all the way through (so your stuffing does not fall through) once you have an opening use a pairing knife or melon baller and create a larger opening to stuff your apple.
- In a small bowl combine everything. If I have time I do this before I leave and place everything into a jar or plastic bag as a quick prep.
- Stuff each apple with equal amounts of the stuffing.
- You can either wrap each apple individually in foil and place into your fire over medium coals for 15 minutes, or in a dutch oven you can place all the apples upright and pour 1/4 cup of water or apple juice and cover the top with foil to steam for 10-15 minutes.
- Serve hot with a fork and knife to dig in. Coconut whipped cream and vanilla bean ice cream is pretty amazing on top too.
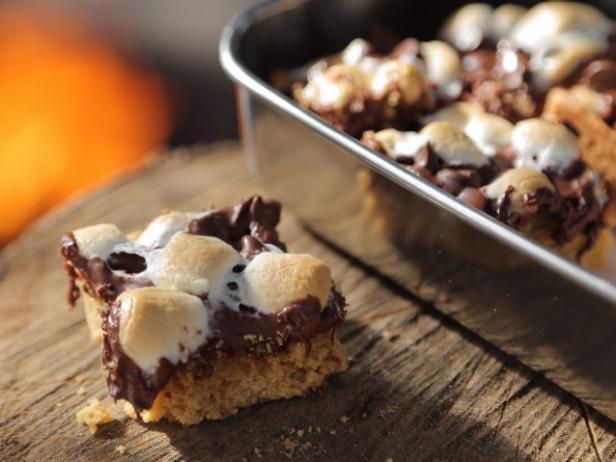
5) Make Ahead Smores Bars, Gluten-free, Sugar-free (8-12 bars)
Crust:
- t
Chocolate layer
- 70% dark chocolate
- full fat
Topping
12oz of mini marshmallow (for dairy-free and gluten-free use Dandies brand).
Instructions:
Preheat oven to 370 degrees and and line an sqaure 8×8 pan with parchment paper. 8×8 inch baking dish with parchment paper.
- Add oats, flour, salt, pecans, and sugar to a blender or food processor until a fine powder.
Add melted coconut oil (5 Tbsp) slowly to the blender or food processor while blending. This will form a loose dough.
- Press the mixture FIRMLY into the lined baking sheet and spread evenly with your hands to pack it down.
- Bake for 17-20 minutes until the edges are golden brown and there is some browning on the surface. Remove from oven and allow too cool.
In the meantime, heat chocolate and milk over low-medium heat on the stove or in the microwave for 30 seconds- careful not to burn. Slowly add in melted coconut oil and stir till well combined.
- Spread the melted chocolate layer over the crust. Freeze until firm and the bar is set.
- Once the chocolate has set, lift the bars out of the baking dish gently with the parchment paper. Top with marshmallows. NOW!! options. You can lift the bars onto a baking sheet and broil in the oven on high for 1-2 minutes (watch they don’t burn). OR you can top with marshmallows and using a food safe kitchen torch you can lightly brown the marshmallow. OR wrap the sheet of bars in foil and pack them gently on the top of the cooler. Once at the campsite you can open the foil, add marshmallows, cover back up and place the bars in the low heat part of the fire to heat up so the bars are gooey (only a few minutes is needed).
Carefully chop into bars or squares and serve immediately.
Drinks
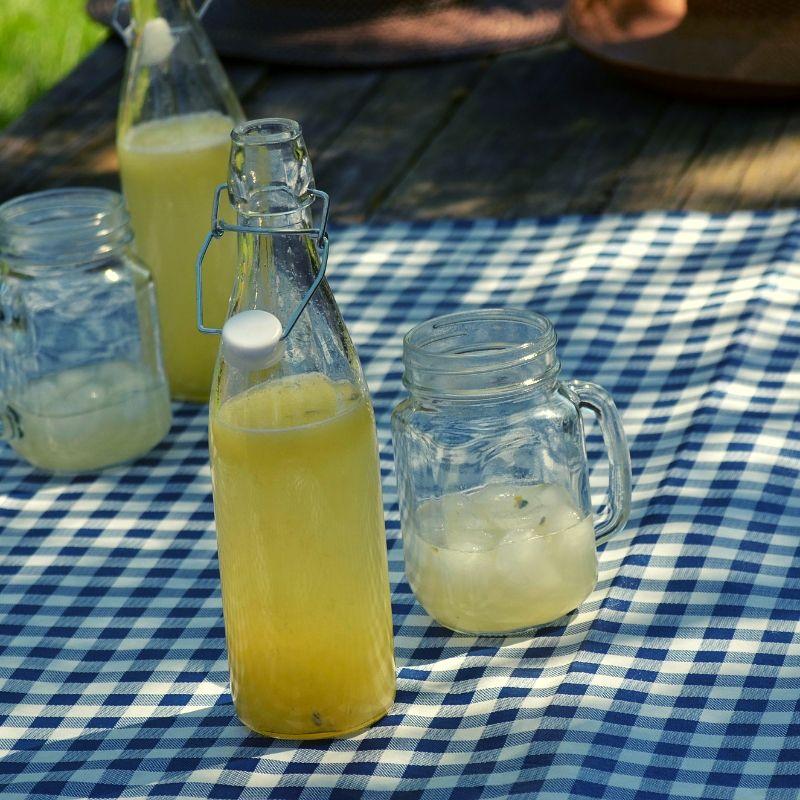
1) Classic Lemonade (8 servings)
Ingredients:
- 1 1/2 cups freshly squeezed lemon juice (from about 12 lemons)
- 1/2 cup sugar
- 6 cups water
- lemon slices (to garnish)
- ice
Instructions:
- In a large pitcher combine the lemon juice, sweetener, and 1 cup water. Stir until the sweetener dissolves, then add 5 more cups water, a few slices of lemon to garnish, and plenty of ice.
Variations: Add 1 tbsp of culinary lavender for Lavender Lemonade, add 1/4 cup of raspberries for Raspberry Lemonade, swap lemons for limes for limonade, and add 1/4 cup of strawberries and a sprig of fresh mint for Strawberry Mint Lemonade.
2) Berry Basil Soda (8 servings)
If you or your kids are pop drinkers then something with fizz with less sugar is a great swap. Low-sugar Kombucha can be a great option, also stevia sweetened drinks that come in a variety of pop flavours can be a great no-sugar option to pack too. Sparking water with fresh fruit can also make a great bubbly water that can hydrate and please pop drinkers too.
Ingredients:
- of your favourite berry (strawberry, raspberry,
- cup, + 2 tbsp organic cane sugar, or honey (stevia can be used if you are keto here)
- 2 cups of ice
Instructions:
You have 2 options in making this soda.
- The easy method: place the berries in the bottom of a jug and with a wooden spoon muddle them a little to break them up. Now add the remaining ingredients into a large jug and stir. Pour into glasses with ice and enjoy.
- A little more time to make a true soda: Before I leave camping I will make the quick soda syrup, place it in a mason jar and bring it in the cooler. That way at the campsite I will pour some of my homemade soda syrup into a jug or cups, add ice and sparking water. Either method is fine but you get a much sweeter soda flavour when you make the soda versus a fruit flavoured sparkling water.
- To make the soda syrup, ddd the berries, sugar and water to a small pan and bring to a boil.
- Turn down the heat to low and simmer the berries for about 5-7 minutes and they start to become soft.
- Turn of the heat and push the mixture through a sieve into a small bowl, squeezing out the syrup. You should have almost 1 cup of syrup.
- Place the syrup in a mason jar or sealed container and keep in the fridge/cooler. To serve I like ti pour 2 tbsp of syrup into the bottom of each glass, add 1 basil leaf to each glass and gently muddle with the back of a wooden spoon. Add ice and fill each glass to the top with sparkling water. Stir with a spoon, add a fun straw and some berries as a garnish. This also makes a great drink mix for the adults with a grain-free vodka.
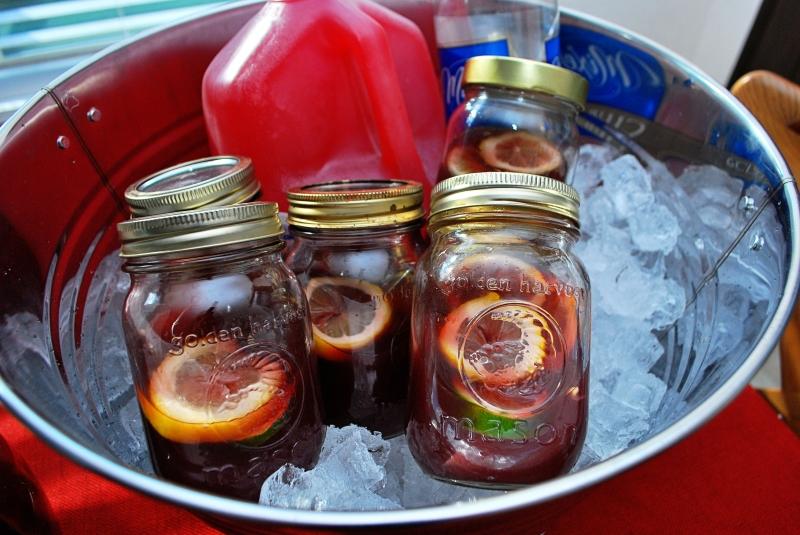
3) Long Weekend Sangria (serves 4-6)
Ingredients:
- sliced (if using white wine I will use a 1 peach instead)
- 1 lemon, sliced
- 1 lime, sliced
- 1/4 cup brandy (optional)
- or white wine
- 1/8 cup of organic cane sugar or stevia/monkfruit for a sugar-free version
Instructions:
- Place everything into a sealed cooler jug to take with you or stir in a jug at home and portion into 500 ml mason jars to pack into the cooler.
4) Red Wine Hot Chocolate (serves 4)
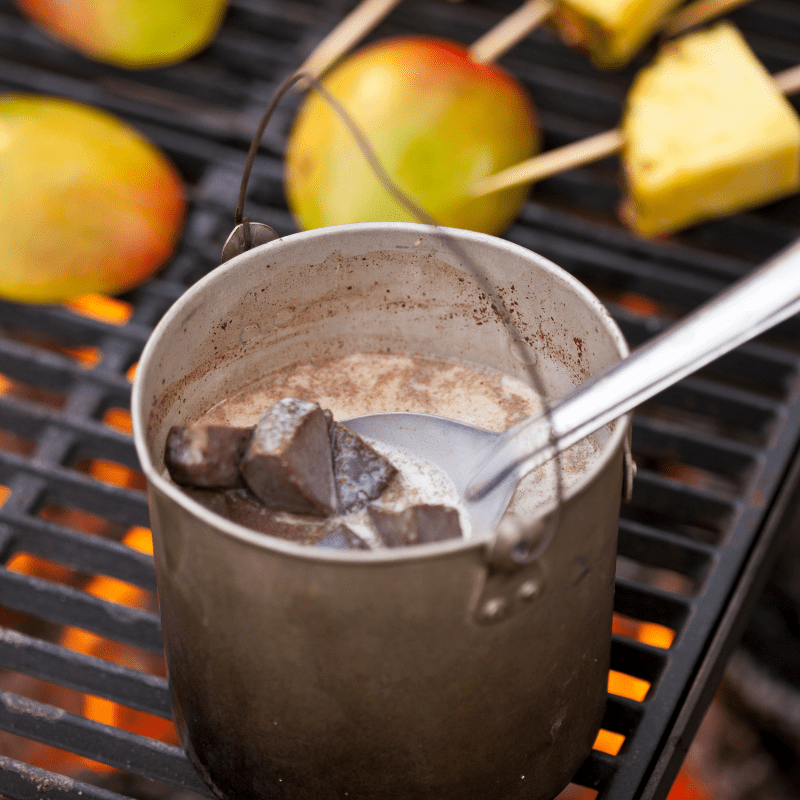
Ingredients:
- 2 cups of Red wine
- 2 tbsp Cacao powder or good quality dark cocoa powder
- 2 tbsp cane sugar, honey or stevia/monkfruit for a sugar-free sweetener
- 1/2 tsp Cinnamon
- 4 cups of full fat coconut milk or organic 2% dairy milk
- Pinch of salt
Instructions:
- Whisk the cocoa powder, sugar, and cinnamon together in a large saucepan over the low-medium fire.
- Add the milk and red wine and bring to a simmer over medium heat, whisking occasionally, until hot and smooth, about 5 minutes.
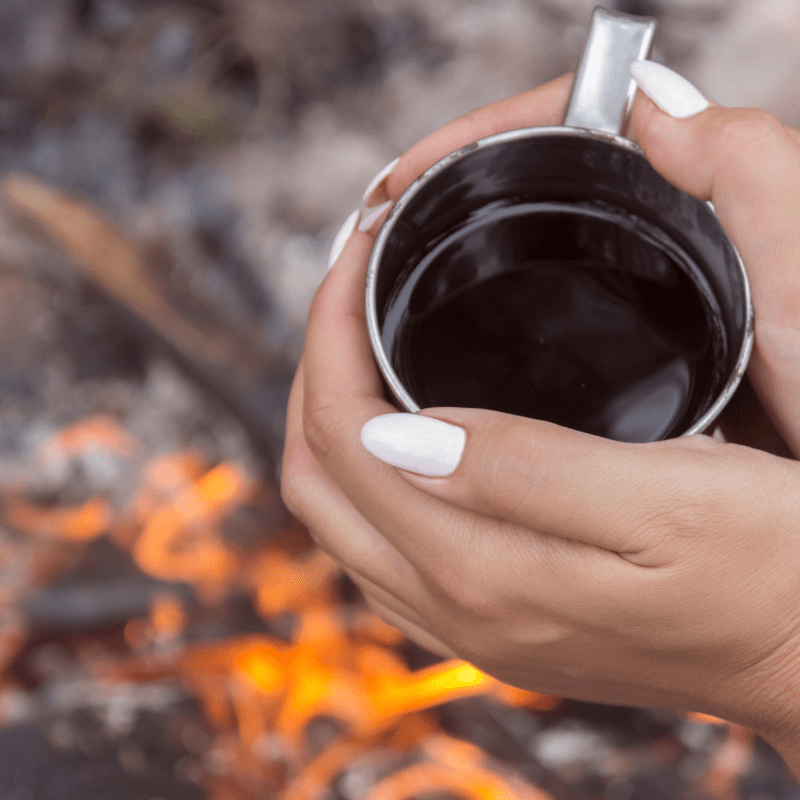
- Serve in your favourite mugs by the fire (adding a fire toasted marshmallow in each mug for a garnish is awesome).
5) Dutch Oven Bourbon Vanilla Cider (omit bourbon for kid friendly version)
Ingredients:
- 1 vanilla bean (or 1 tbsp vanilla)
- ,
- 6oz bourbon (omit for kiddos for an apple cider)
Instructions:
- Pour apple juice, cinnamon sticks, vanilla bean, spices, and orange juice in a pot. Bring to a boil, then reduce to a simmer. Simmer the cider for at least 10 minutes to allow the flavours to become bold.
- Add the bourbon, then stir to combine. Pour through a strainer into your favourite mugs.
These 25 Healthy Campfire Recipes are a great way to use whole foods while still finding balance to enjoy camping classics with your family like hot chocolate and smores.
BUY & PACK SNACK IDEAS:
 Additionally some fun snacks and treats I like to pack too but not mentioned above include:
- Organic Popcorn
- Veggie Sticks
- Kale Chips
- Chickpea Snack Bags (you can make them too, here is my recipe)
- Apple Chips & Dip (you can make them too, here is my recipe).
- Low-Sugar Fruit Leather (or make them, recipe here)
- Nitrate-free Beef Jerky (usually snag from the farmers market)
- No-Bake Energy Balls (I have a handful of some great energy ball recipes on my snack page here)
- Buy a container of Hummus or Tzakiti and bring pre-cut veggies
- Watermelon! Nothing better than cutting up a whole watermelon and taking slices in an air-tight container for the weekend.
- Snag bags of seasonal fruit at fruit stands on the way
- I will buy a mixed bag of frozen fruit, pack tetra packs of coconut water, and take a small baggie or my protein powder for smoothies if I have a power outlet for a small portable blender like a Bullet.
- A pack of frozen turkey burgers are a great addition when you are in a hurry.
- A bag of good granola cereal and tetra pack nut milk like hemp or oat that does not need to be refrigerated.
YOUR 4-Day Long Weekend Meal Plan & Grocery List: free-4-day-long-weekend-camping-meal-plan-2
You can keep things interesting by swapping out recipes in the meal plan with any of the other recipes provided in the blog post. Pick your favourites, mix and match, make adaptations to meet your families needs. Most of all have fun and enjoy! I hope these recipes and ideas are really helpful for your and your family when you plan your next trip. If I missed a favourite one be sure to leave me a comment below! I love to hear from you.
In great health,
Jo